
What's better than playing Nintendo on a 65" screen? Nothing!
I grew up in the 1980s. That meant we drank far too much Kool-Aid, and on Saturday mornings, we got up early to watch cartoons. It also was the heyday of arcades, but I lived in the ghetto of Detroit and couldn't afford quarters to play games. Plus, there were none anywhere near the neighborhood where I lived. For me, the first real video-game experience was the Atari 2600. I played a lot of Frogger, Pac-Man and Yars' Revenge in middle school. The first system really to impact me, however, was the original Nintendo Entertainment System (NES).
My family moved to northern Michigan when I was in eighth grade, and I worked all summer to save for a used NES from one of the kids who got a brand-new Super Nintendo from his parents. I was a poor nerdy kid who moved in the middle of eighth grade, so my group of friends was fairly small. I had exactly one friend. There happens to be two controllers with a Nintendo, so it worked out perfectly for Pete and me. While the arcade system I built back in 2007 (my first Linux Journal article) may have been to relive the 1980s, this article's project is really a better look at my actual childhood. And this article's project is awesome!
My end goals for this project are the following:
Play Nintendo and Super Nintendo games using emulation on a Raspberry Pi.
Fit the project into a wooden cigar box (because I already have a cool wooden cigar box).
Use original NES and SNES controllers, not USB knockoffs.
Boot up, select and play games using nothing more than the controller for navigating menus.
Plug controllers into emulation machine using either original connectors or RJ-45 plugs.
Have a good way to turn the machine on and off, not just unplug it.
Support HDMI, because that's what all televisions and projectors use now.
Support game state saves and restores. (Yes, it's cheating, but I'm more than 40 years old, so if I want to save myself 40 hours of play every time I get to a boss level, I'm gonna do it!)
Thanks to the size of the Raspberry Pi, it's possible to build a project like this into just about anything. I don't have an NES case anymore, but if I did, I'd probably build it inside one for added nostalgia.
I decided to use RetroPie as the distribution for my project. The great thing about using RetroPie is that it basically solves all the issues on my list. It has the “Emulation Station” front end built right in (Figure 1), which supports navigation via controller. It also has emulators already installed, waiting for ROMs to be added. Truly, using RetroPie as my base saved at least one article on software alone!
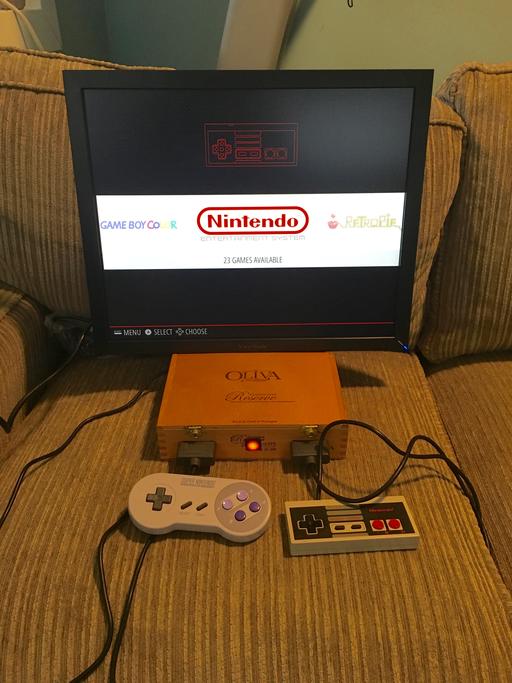
Figure 1. This is the completed system. Notice the working power LED and both types of controllers plugged in. The screen shows Emulation Station's front end.
Also, since I'm using the incredible RetroPie software, I could easily add more platforms to my emulator. If you were a Sega Genesis fan, for instance, you could add those ROMs and get back a slice of your own childhood. RetroPie supports somewhere around 20 different platforms! I just wanted Nintendo and Super Nintendo, but obviously you can support whatever games you want.
First off, it's important to note that I've been building this machine on and off for months. I didn't come up with a list of items all at once; rather, while I was building, I'd realize I needed something and order it. I also decided to do this build “right” versus how most of my projects go. In a huge paradigm shift for me personally, you won't find any duct tape in the box. That said, please don't buy all these parts just because I did. Your build will look different, especially at first. Duct tape is perfect for the trial stage, and often, there's no need to get past the trial stage!
Here's my list:
Cigar box (Figure 2): I bought this at a sidewalk sale for $2. It didn't contain any cigars, thankfully.
Raspberry Pi 3: it's taken me so long to complete this project, I had to buy a new RPi twice, because new iterations kept coming out! I started with the original RPi B, then bought version 2, and recently, version 3 with Wi-Fi and Bluetooth.
ControlBlock from blog.petrockblock.com (Figure 3): this is a new device, and it is amazing. You can use the GPIO pins directly if you want, but buying this device makes the project simple and incredibly awesome. It's $39, and worth it.
Original SNES and NES controllers: I got these from Goodwill and eBay. I have had about a 50% success rate with the eBay controllers. I suspect they're just really worn out. I haven't tried the aftermarket ones on Amazon, but they might work.
Extension cables for SNES and NES: I used these to make connectors and adapters. They're from Amazon.
HDMI/USB mountable extension cables (Figure 4): this allowed me to connect HDMI and USB from the outside of the box. I like this particular one because it has a round mounting hole. Round holes are easier to make than square ones!
Flush-mount power socket: I'm just using 5V for the project, so anything that supplies 5V would work, even a hefty phone charger (2–3amps).
Soldering equipment: I suck at soldering, so I got a fancy device for holding things while soldering. Be sure to get rosin core solder as well.
LED switches (toggle), nylon standoffs (for RPi mounting), wires, resistors, shrink tubes for wires, hole saws, hot glue and probably 50 other things I can't remember—also probably duct tape, but I honestly don't think so!
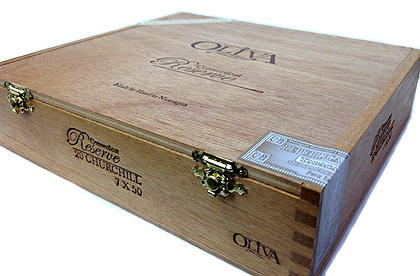
Figure 2. This is the cigar box I used. It was surprisingly sturdy, but obviously not the only option for building something like this.
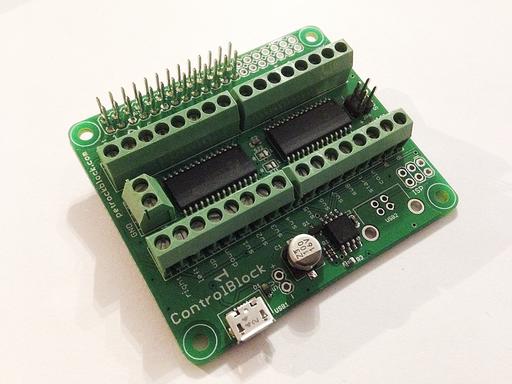
Figure 3. The ControlBlock from petRockBlock is amazing. Truly, it took this project to the next level. I can't recommend it highly enough.
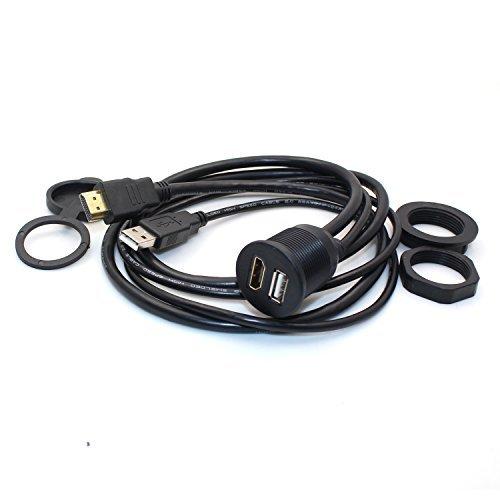
Figure 4. This adapter was from Amazon, and it is my way of cheating. I'm not good at soldering, so prebuilt cables are awesome. Unfortunately, 3-feet long was the shortest option.
Wiring the controllers is the most difficult part, so I started there. The cool thing about NES and SNES controllers is that they use the exact same wiring. The SNES just has more buttons. That means you can plug them in to the same wiring harness, and it will work the same. Unfortunately, the NES and SNES have different connectors, even though their pinouts are compatible (Figure 5). That means if I wanted to have swappable controllers, I had to make them both plug in to an identical port. I considered using RJ-45 connectors. I still think it's a pretty good idea, but the thought of cutting all those original controllers broke my heart. (I snipped an NES controller and almost cried.) That's when I came up with the idea to use cheap extension cables to make both controllers work. Figure 6 shows the front and back of my cigar box with the SNES extension cable “console side” mounted. That allows me to plug the SNES controller directly in to the box, like an original SNES console.
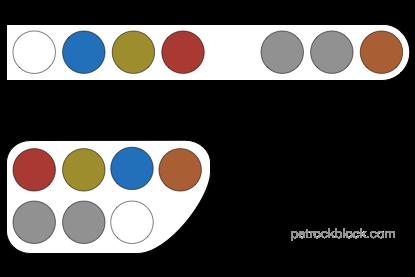
Figure 5. Although shaped differently, the NES and SNES controllers use the exact same wiring. That makes the controllers interchangeable too, which is awesome.
In order to plug in the NES controllers, I bought an NES extension cable (Figure 7), and I'll use the remaining half of the SNES extension to make an adapter cable. I'll be able to plug the adapter cable in to the cigar box and then the NES controller in to the other end of the adapter cable. I'll never need to snip an actual controller, just the cheap extension cables! (Note: to make the cables, look at the pinouts in Figure 5 and connect the appropriate wires from each extension half together. I recommend soldering those connections and sealing them in shrink tube.)
Normally, I'd just use double-sided sticky tape to attach the RPi. For some reason, I thought using nylon standoffs (from Amazon) would be a good idea. If you look closely (Figure 8), you'll see my first drilled holes didn't work, because the HDMI cable connector was too big. I had to drill new holes that allowed more room for the HDMI connector and accompanying USB connector. So, I have four extra holes in the bottom of the box. Maybe I'll fill them with wood putty, but probably not.
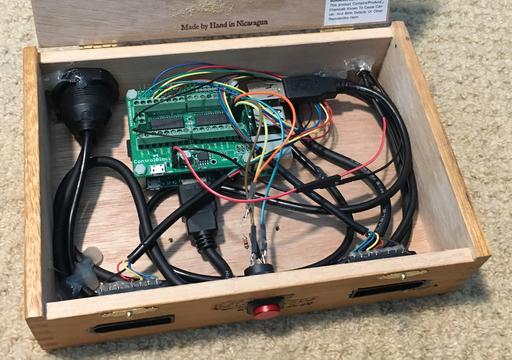
Figure 8. If you look closely you can see my poorly drilled holes. You also can see why I had to move the RPi. The HDMI connector was just too big.
The ControlBlock fits right onto the Raspberry Pi's GPIO pins. You don't have to use nylon standoffs, but since I had a box of them, I used them to mount the ControlBlock securely on top of the Raspberry Pi. You'll notice the ControlBlock has really nice screw-mounts for wires. That means connecting the controllers doesn't take solder. Sweet! The pinout for connecting the SNES (or NES, they're the same) controllers is on the petRockBlock website. (It's shown in Figure 9 as well.) It's important to note that where the controller pinout says 5V, when connecting to the ControlBlock, you use the VCC pins, which are actually 3.3V. (The Raspberry Pi uses 3.3V on its GPIO pins, so the ControlBlock uses that for signaling. Apparently it's enough for the controllers, because it seems to work!)
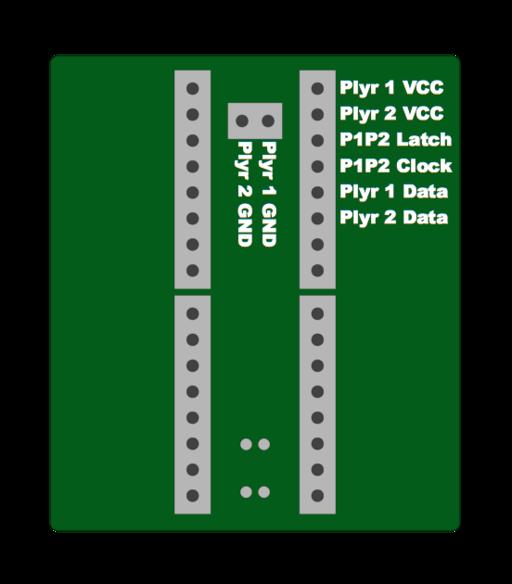
Figure 9. The SNES/NES controllers use only a fraction of the GPIO pins. If you're using the ControlBlock for an arcade setup, it supports far more buttons.
The other cool feature of the ControlBlock is that it has a really awesome method for powering the Raspberry Pi on and off. You supply power to the ControlBlock (via MicroUSB or via soldered 5V pins, which I did) and then attach a toggle switch. When the toggle switch is “on”, the Raspberry Pi boots up. When it's “off”, the Raspberry Pi shuts down properly, going through the entire shutdown process. Plus, if you attach an LED, it will flash slowly while booting up and stay solid while the RPi is booted. Then it will flash quickly as it powers down and turn off when the Raspberry Pi turns off. It beats the heck out of just unplugging the unit to turn it off!
If you look back at Figure 8, you'll see the other things I connected. The power wires are soldered to the ControlBlock, but a MicroUSB power cable could be used instead. I have that HDMI/USB extension mounted to the back of the cigar box (Figure 10), and the wires plugged in to the RPi. The cable was 3-feet long, which was inconvenient, but rather than cut and solder them shorter, I just coiled up the excess and hot-glued it to the case. If I were better at soldering, I'd get real flush-mount HDMI and USB ports, and just wire them that way. This was a compromise that I'm happy with.
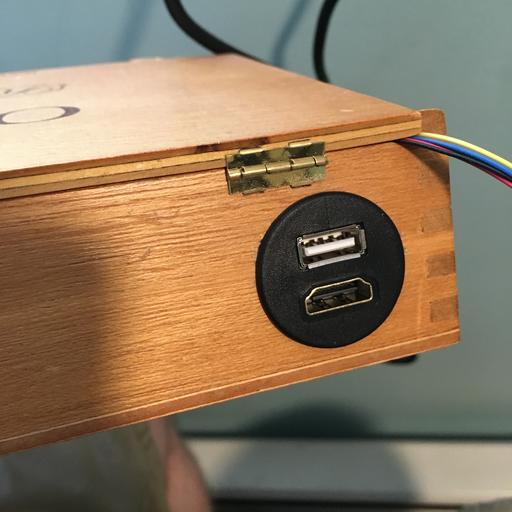
Figure 10. Another cheat: the HDMI/USB flush-mount extension required me to drill a big round hole instead of chipping out a square mounting hole.
The toggle switch I purchased was from Adafruit. It has an LED built in, so I was able to wire the LED and the toggle switch directly to the ControlBlock. I didn't realize the LED was only a 2 or 3 volt LED, so I burned out several before I realized I had to put a resister in series with the LED. I bought an entire box of resisters, but really needed only a single 1000 Ohm for the project. The mounting for the switch was round, so again, I could just drill a hole to get it mounted. If you look at my SNES controller mounts, you'll see that I don't really have the tools for anything odd-shaped, and if it weren't for copious amounts of hot glue, the SNES controller adapters would never stay! Figure 11 shows most of the junk I ended up purchasing for the build.
I mentioned earlier that I used RetroPie as the distribution for this emulation machine. It's based on Raspbian Linux, but it boots directly into Emulation Station, and it includes the binaries for tons of emulators. The only customization you need to do is to download, compile and install the ControlBlock software. Like I said, it's possible to create one of these without the ControlBlock, especially if you're going to use USB controllers. But for me, the $39 was well worth it. Plus, the money goes to a single person who develops them and gives away the software. I bought three ControlBlocks, and I'll be using the others for a new arcade machine. I won't go through the process for setting up the ControlBlock software, but if you go to blog.petrockblock.com, you'll find very simple directions that work perfectly with RetroPie. (Just a note: when it comes time to configure the ControlBlock config file, you'll use “SNES” as the controller type, even if you're using NES—remember they're the same as far as the software knows; the NES controllers just have fewer buttons.)
The only other software-related work to do is to install the ROMs. If you have a Raspberry Pi with network capability, it sets up a writable SMB guest share called “ROMS” that you can connect to and upload the ROM files directly. I can't tell you where to find ROM files for console systems, but Google is your friend. Getting those old ROM files can be a legally questionable procedure, but there are some free ones available at the very least.
Once you upload the ROM files into the appropriate folders, when you restart the RPi, the appropriate emulators will appear for you to select games. On the first run, it will have you set up your controllers, but that just requires the controllers to be plugged in; the rest is self-explanatory.
Now you play games like it's 1989—or perhaps the early 1990s, depending on your platform of choice. The emulation is amazing, and if you look closely at the configuration options, you'll see there are “shift” keys for the controllers. That means while you're playing, you can hold down the select key and then press various buttons on the controller to perform system-level actions like resetting the game, or saving and restoring save-game states. It's really like the original consoles, but better. I can't explain how awesome it is to play these old games using the original controllers, but on a huge LCD screen instead of an old 19" television.
My next gaming project will be to create a new arcade system. My original arcade machine didn't survive our recent moves, so I have to (get to?) start from scratch. This time, I'm using a Raspberry Pi and a ControlBlock to emulate those old arcade classics. Until then, I'm quite happy with my cigar box!